Table of Contents
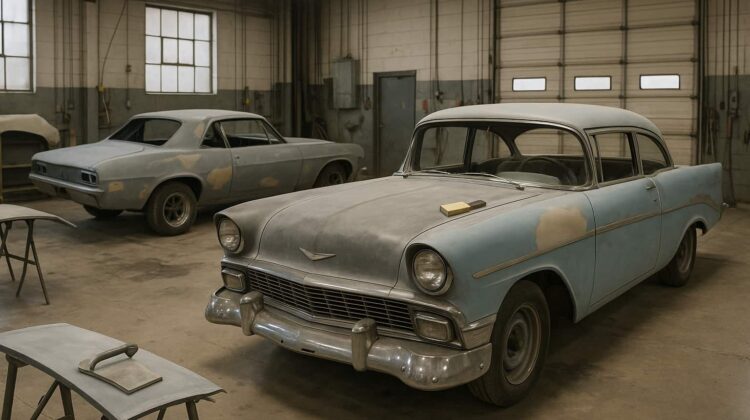
Dynacorn body panels have become the gold standard for classic car restorers who refuse to compromise on fitment, metal quality, or long-term durability. Whether you’re bringing a 1969 Camaro back from the dead or straightening out a tired Chevelle, choosing the right sheet metal is the single most important decision you’ll make in your entire restoration. At National Restoration Parts, we’re committed to helping you research, plan, and execute your build with confidence — and when it comes to sourcing those panels, we consistently point our community to Classic Body Parts for the best prices on Dynacorn products.
In this guide, we’ll walk through five of the best Dynacorn body panel picks for the most popular classic American muscle cars and trucks, explain what makes each one worth your investment, and give you the installation knowledge you need to get them on straight the first time. Let’s get into it.
Why Dynacorn Body Panels Are the Restorer’s First Choice
Not all reproduction sheet metal is created equal. If you’ve spent any time in the restoration hobby, you’ve probably heard horror stories about panels that arrive wavy, have weld flanges in the wrong position, or require hours of massaging before they’ll even come close to fitting. That’s the nightmare Dynacorn International was founded to solve.
Dynacorn manufactures their panels using the same stamping process as original equipment — high-quality steel, precision tooling, and strict dimensional tolerances. The result is replacement sheet metal that fits the way the factory intended. For restorers chasing a show-quality finish or a correct factory appearance, that level of precision is non-negotiable.
Here’s what consistently separates Dynacorn from cheaper alternatives on the market:
- OEM-grade steel thickness — matches original gauge for proper weld penetration and finished appearance
- Stamped, not rolled — character lines, body contours, and weld flanges are formed in a die, not hand-shaped
- E-coat or primer coating — protects against rust during storage and installation
- Extensive catalog coverage — Camaro, Chevelle, Firebird, Mustang, Challenger, Bronco, C10, and more
- Direct replacement fit — designed to align with factory mounting points without custom fabrication
When you buy Dynacorn panels through Classic Body Parts, you’re getting genuine Dynacorn quality at prices that beat most of the competition. That combination of price and pedigree is hard to argue with.
How to Choose the Right Panel for Your Restoration
Before we get into the top five picks, it’s worth spending a moment on the selection process. Walking up to a parts catalog and ordering the first panel that matches your year/make/model isn’t quite enough. Here’s a quick framework for making the right call:
Assess the Damage First
Full quarter panels, rocker panels, and floor pans are major investments in both money and labor. Before pulling the trigger, do a thorough inspection with a quality metal probe or pick. Tap along the surface — dull thuds indicate filler, hollow sounds indicate rust. Determine whether you need a full panel replacement or whether a repair section will do the job. Dynacorn offers both full and partial (patch) panels for many applications, and choosing the right scope will save you significant time.
Confirm Your Body Style and Build Date
This is especially critical for first-generation Camaros and Mustangs. A 1967 Camaro coupe and a 1968 Camaro coupe use different body stampings in several areas. Similarly, early and late production runs sometimes have subtle differences. Pull your VIN, trim tag, and any available build sheet data before ordering. When in doubt, call the team at Classic Body Parts — they can help confirm fitment based on your specific car’s details.
Plan Your Labor and Tooling
Dynacorn body panels are designed for professional-quality installation, but that doesn’t mean you need a full body shop. Most installations require a MIG welder, body grinder, weld-through primer, and basic hand tools. Full quarter panel replacements — particularly on uni-body cars — require careful attention to body alignment, so access to a frame machine or alignment jig is strongly recommended. Partial panels and cab corners are more approachable for experienced DIYers.
The 5 Best Dynacorn Body Panel Picks
These picks represent the highest-impact, most commonly needed panels across the most popular classic vehicles. They’re chosen based on how often they’re needed (rust and damage patterns), the quality of Dynacorn’s tooling for that application, and the overall value they deliver in a finished restoration.
Pick 1: 1967–1969 Camaro Quarter Panel
The first-generation Camaro is arguably the most restored American muscle car on the planet, and its quarter panels are almost always the first thing to go. The rear quarters on these cars trap moisture behind the wheel arch, and decades of road salt, standing water, and neglected paint mean that even cars from the sunbelt often show rust in the lower quarters and sail panel areas.
Dynacorn’s full replacement quarter panels for the 1967–1969 Camaro are among their most refined stampings. The body lines — including the critical upper character line that runs from the door opening to the tail, and the lower body accent line — are crisp and correctly positioned. The wheel arch radius matches factory dimensions, which is crucial for proper gap alignment with the quarter panel extension and rear bumper.
Installation tips for Camaro quarter panels:
- Remove all interior trim, rear seat, package shelf, and any sound deadener in the quarter area
- Mark factory weld locations before cutting — use a spot weld drill bit to separate the original panel cleanly
- Apply weld-through primer to all bare metal mating surfaces before fitting the new panel
- Tack-weld in stages — start at the body line, then work outward to control distortion
- Use a body alignment jig or verify door gaps, trunk lid gaps, and quarter panel extension alignment before final welding
- Finish weld seams, apply seam sealer, and prime the inner structure before closing up the interior
Where to buy: Classic Body Parts carries the full lineup of Dynacorn Camaro quarter panels for coupe and convertible applications. 1967-1969 Camaro quarter panels and source the right side while you’re at it — if one is rusty, the other isn’t far behind.
Pick 2: 1968–1972 Chevelle / El Camino Rocker Panel
The Chevelle and El Camino share a body platform that’s prone to rocker panel rot. These cars sit low, the rocker sills collect debris and moisture, and the factory drainage provisions in this area are marginal at best. By the time you find a solid-looking Chevelle at a swap meet, there’s a good chance the rockers are paper-thin underneath whatever texture paint or fiberglass filler is hiding the truth.
Dynacorn’s Chevelle rocker panel replacements are full-length stampings that include the correct step profile and body line detail. Unlike cheap patch sections that force you to do butt welds in the middle of a visible panel, these are designed to be proper full replacements that restore the structural integrity of the rocker cavity.
Key considerations for rocker panel replacement:
- Remove the door and check the lower door hinge pillar condition — if the rocker is gone, the hinge pillar base may be compromised too
- Support the body properly before cutting out the old rocker — uni-body cars can sag at the door opening
- Use a door alignment bar or hang the door during fitting to maintain proper gap
- Seal the inner rocker cavity completely with cavity wax or rust inhibitor after welding
For Chevelle and El Camino rocker panels, Classic Body Parts has both driver and passenger side options available. Check out the 1968-1972 Chevelle rocker panel LH / 1968-1972 Chevelle rocker panel RH and confirm your body style (coupe vs. convertible vs. El Camino wagon) before ordering, as the panel profiles differ.
Pick 3: 1967–1969 Pontiac Firebird Floor Pan
The Firebird shares its F-body platform with the Camaro, which means it benefits from the same high-quality Dynacorn tooling. Floor pans are a universal weak point on F-body cars — water intrusion through worn firewall grommets, rusted heater box seals, and failed trunk seams all conspire to turn the floor into a sieve. A complete floor pan replacement is one of the most satisfying restorations you can do, transforming a car that smells like wet rust into something you’d actually want to sit in.
Dynacorn’s Firebird floor pans are available as complete assemblies or front/rear sections depending on your specific damage pattern. The transmission tunnel stampings are correctly profiled for both manual and automatic transmission applications — pay attention to this detail when ordering, as the tunnel shape differs.
Floor pan replacement is a significant undertaking. Here’s a condensed overview of the process:
- Strip the interior completely — carpet, seats, seatbelt anchors, pedal assemblies, everything
- Support the body on a rotisserie or jackstands positioned at the factory body mounting points
- Remove the original floor by drilling out spot welds along all flanges
- Clean up all mating surfaces — remove rust with a wire wheel and treat with a rust converter if needed
- Test-fit the new floor pan and verify tunnel alignment with the transmission before welding
- Stitch weld the perimeter, apply seam sealer, and undercoat before reinstalling any components
Classic Body Parts stocks Dynacorn floor pan sections for the Firebird platform. 1967-1969 Pontiac Firebird floor pan complete — this is one of those parts where buying quality once pays dividends for the life of the restoration.
Pick 4: 1970–1974 Dodge Challenger / Plymouth Cuda Quarter Panel
The E-body Mopar — the Challenger and the Cuda — has seen a dramatic rise in restoration activity over the past decade as values have climbed and aging survivors have needed serious metalwork. These cars have distinctive quarter panels with bold, sweeping lines and deep body contours that are absolutely critical to getting the final appearance right. A poorly fitted quarter panel on a Challenger stands out immediately.
Dynacorn’s E-body quarter panels are some of their most impressive stampings. The dramatic forward kick of the lower body line, the raised wheel arch profile, and the sail panel geometry are all accurately reproduced. For convertibles, additional care is needed because the structural role of the quarter is more significant without the roof for rigidity.
E-body specific installation notes:
- The 1970–1971 and 1972–1974 quarter panels are not interchangeable — confirm your year before ordering
- Challenger and Barracuda/Cuda quarters are different stampings — do not mix them up
- The lower quarter-to-rocker transition is a common rust area; plan to inspect and potentially repair the rocker end cap at the same time
- Use an alignment jig or measure diagonally from the door hinge to quarter panel mounting bolts to ensure proper geometry
Classic Body Parts is an excellent source for Dynacorn E-body panels. Search for the 1970-1974 Dodge Challenger Carpeted Floor Mat Set Black 4 Piece Set and take advantage of their competitive Dynacorn pricing.
Pick 5: 1973–1979 Chevy C10 / GMC Pickup Cab Corner
The square-body C10 truck is having an enormous cultural moment right now. From mild restorations to full frame-off show builds, these trucks are being saved and celebrated in huge numbers. And while the C10 is a robust, relatively simple vehicle, cab corners are almost universally rotted. The lower rear corner of the cab traps mud, moisture, and road salt, and the factory seam sealer fails over time — leaving bare metal to oxidize behind the scenes for years before you ever see bubbling paint.
Dynacorn’s C10 cab corner panels are precision stampings that match the factory profile, including the correct drip rail transition and lower cab corner radius. They’re available in left and right side configurations, and they’re designed for either butt-weld or overlap installation depending on your preference and the extent of the surrounding metal condition.
C10 cab corner installation overview:
- Remove the running board or step side board to gain access to the lower cab corner area
- Clean the area and probe the surrounding metal to determine the true extent of the rust
- Trim the damaged area with an air saw or cut-off wheel — leave as much good metal as possible
- Test-fit the Dynacorn cab corner and mark your trim lines — you may need to trim the new panel for a butt-weld fit
- Apply weld-through primer, tack in place, and verify fitment before final welding
- Stitch weld to minimize heat distortion, grind smooth, apply filler if needed, prime and paint
For C10 cab corners and related square-body sheet metal, Classic Body Parts is stocked and ready. Grab the 1973-79 Chevy C10 cab corner LH / 1973-79 Chevy C10 cab corner RH — and check both sides while you’re at it, because if one is rusted, the other rarely escapes unscathed.
Dynacorn Panel Comparison: Quick Reference Table
Here’s a summary of the five picks to help you quickly reference key specs and fitment considerations:
| Vehicle | Panel Type | Year Range | Key Fitment Note | Difficulty Level |
|---|---|---|---|---|
| Chevrolet Camaro | Quarter Panel (Full) | 1967–1969 | Coupe vs. convertible — different part numbers | Advanced |
| Chevrolet Chevelle / El Camino | Rocker Panel (Full) | 1968–1972 | Body style affects rocker profile | Intermediate |
| Pontiac Firebird | Floor Pan | 1967–1969 | Transmission type affects tunnel shape | Advanced |
| Dodge Challenger / Plymouth Cuda | Quarter Panel (Full) | 1970–1974 | Challenger and Cuda are different stampings | Advanced |
| Chevy C10 / GMC Pickup | Cab Corner | 1973–1979 | Confirm fleetside vs. stepside bed style | Intermediate |
Essential Tools for Installing Dynacorn Body Panels
One of the most common mistakes restorers make is ordering the panel without preparing their shop for the job. Dynacorn body panels are designed for professional-quality installation — and while that’s achievable in a well-equipped home shop, you do need the right tools before you start cutting metal.
Welding Equipment
A MIG welder is the industry standard for body panel installation. You’ll want a machine capable of welding 18–20 gauge steel with precision — something in the 130–180 amp range with adjustable wire speed. Popular choices include Lincoln Electric, Miller, and Hobart units. Set up with .023 or .025 wire for thin body metal to minimize heat distortion.
Cutting and Grinding Tools
You’ll need an angle grinder with both cutting discs and grinding/flap discs. An air body saw or die grinder with a cut-off wheel gives you more control for precision cuts near weld flanges. A spot weld drill — sometimes called a Blair cutter — is essential for removing original panels cleanly without damaging the substrate metal underneath.
Body Alignment Tools
- Cleco fasteners — temporary panel clamps that hold panels in alignment during test-fitting
- Magnetic weld-hold clamps — keep panels flush during tack welding
- Body alignment bars — maintain door openings on uni-body cars during rocker or quarter replacement
- Measuring tape and diagonal measuring — always verify symmetry before final welding
Surface Prep and Finishing Products
Weld-through primer is non-negotiable for all mating surfaces before welding. After welding, a quality epoxy primer should go on all bare metal before any body filler work begins. Seam sealer — both brushable and gun-grade — is needed at all welded seams to restore the factory waterproofing. Don’t skip these steps; they’re the difference between a 20-year restoration and one that starts rusting again in five.
Why Classic Body Parts Is the Best Source for Dynacorn Panels
At National Restoration Parts, we serve as a comprehensive resource for restoration knowledge, planning guides, and community support. When it comes time to actually purchase the sheet metal for your project, we consistently recommend Classic Body Parts — and here’s why.
Classic Body Parts specializes exclusively in Dynacorn restoration parts for classic American vehicles. That narrow focus means they know the catalog inside and out, they maintain deep stock levels on the most popular applications, and their customer service team can actually help you sort out fitment questions — something a general-purpose parts retailer can’t always deliver.
Pricing is another major factor. Classic Body Parts consistently offers the best prices on Dynacorn body panels available online. For a project that might require multiple panels — quarters, floors, rockers, cab corners — those savings add up quickly and can mean the difference between staying on budget and blowing past it.
Their catalog covers all the vehicles discussed in this guide and more, including:
- 1967–1969 Chevrolet Camaro (all body styles)
- 1968–1972 Chevrolet Chevelle and El Camino
- 1967–1973 Pontiac Firebird and Trans Am
- 1970–1974 Dodge Challenger and Plymouth Barracuda/Cuda
- 1965–1973 Ford Mustang
- 1966–1977 Ford Bronco
- 1973–1987 Chevrolet and GMC C10, Suburban, Blazer, and Jimmy
Common Installation Mistakes to Avoid
Even with quality Dynacorn panels in hand, installation errors can turn a great part into a frustrating experience. Here are the most common pitfalls and how to avoid them:
Skipping the Test Fit
Never weld a panel in permanently without a thorough test fit first. Cleco or clamp the panel in place, hang the adjacent doors or lids, and verify all gaps before striking an arc. It’s much easier to adjust panel position before welding than after. Most professional body shops do multiple test fits before committing to final welds.
Welding Too Fast and Creating Distortion
Heat distortion is the enemy of a straight panel. Stitch welding — short welds spaced apart and allowed to cool between passes — is the correct technique for body panels. Never run a continuous bead on body metal. Work in a star pattern around the panel, alternating positions to distribute heat evenly.
Neglecting the Inner Structure
The visible outer panel is only half the story. Rust in the inner structure — inner quarter panels, inner rockers, floor braces — will eventually telegraph through your new outer panel if left untreated. Treat all inner metal with rust converter, apply weld-through primer, and apply seam sealer to all inner seams before closing up the car.
Not Addressing Drainage
Many of the rust issues that destroyed the original panels were caused by drainage failures. Before finishing the new panels, inspect and clear all factory drain holes, restore any damaged drain grommets, and ensure water has a clear path out of the body cavities. This simple step dramatically extends the life of your new sheet metal.
Final Thoughts: Start Your Restoration Right with Dynacorn
Choosing quality Dynacorn body panels from the start is one of the best investments you can make in any classic car or truck restoration. The precision fit, correct metal gauge, and accurate body line reproduction make these panels worth every penny — especially when you consider the labor hours you’ll save not having to massage a cheap alternative into alignment.
National Restoration Parts is here to help you research, plan, and execute your restoration with the best information available. When you’re ready to order the actual metal, head to Classic Body Parts where you’ll find genuine Dynacorn panels at the best prices online. Their team knows the catalog, they stock deep, and they’ll help you get the right part the first time.
Ready to get started? Browse the full Dynacorn sheet metal selection at Classic Body Parts — Dynacorn body panels full catalog — and start building your parts list today. Your classic deserves nothing less than the best sheet metal available.